Armada: Rebel Commanders
 |
| Definitely not talking about climate change. |
In this article, I'll be taking a look at the Rebel commanders to analyze their strengths and weaknesses. I will also cover their typical fleet archetypes as well as the general strategy needed to play and play against these particular commanders. Just like the Imperial commander's post, this one will be speaking specifically from a Wave 2 standpoint.
 |
| Seriously, what is up with those robes? |
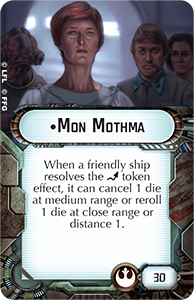
Mon Mothma
When you think about Mon Mothma, you think about Evades. When you think about Evades, you think about ships that can take multiple Evades. Mon Mothma is basically the commander you want to take if you want to take a long-range fleet that can kite you from far away, plinking away at your shields and forcing you to spend defense tokens, before closing in for the killing blow. That's why when you look at most fleets with Mon as their admiral, you see loads of CR90s, Assault Frigates and MC30cs. All of these ships benefit immensely from having Mon as their admiral because her ability basically makes Evades effective through all range bands, with their biggest boon of outright negating dice also being effective in close range. This is huge because a lot of the ships that she likes to field doesn't have a lot of hit points, and getting the most out of evade tokens is the only way the fleet stays alive. Good thing that for ships like the CR90 and MC30c, you have redundant Evades which makes them very strong against Accuracy dice. With TRC90s being a big thing now, and MC30cs having incredible potency in close-range fights, Mon Mothma has become very powerful in Wave 2. Her only vulnerbility is the ships that she likes having in her fleet. Sure, the TRC90s might do a good amount of damage, but they can die to a swift breeze if the dice go wild. Such is the price of playing a super high-skill cap commander.
 |
| I heard you like tokens. |
Garm Bel Iblis
This commander is all about token effeciency. Not only does he give your fleet an immediate boost out the gate because he loads all your ships up with tokens, but he does it again at the start of the fifth round too. This makes him extremely powerful on ships with higher command values since he can get the most bang for your buck that way. The extra tokens also makes him really powerful when fielding squadrons, because the extra squadron token allows you to activate an extra fighter. Most of the time, I see him in fleets that have the MC80 or MKII, but also Nebulons because of their solid synergy with squadrons. I would say that overall, he doesn't really have any tricks or gimmicks in how to make him work. Just have enough ships that can benefit from all the tokens he'll provide and you'll be good to go. The more ships you can keep alive with these tokens, the more you will benefit even more when the fifth round hits and you get them all again. While the Imperial commander Tarkin trickles in tokens and is more reactionary, Garm is very bursty in the bonus that he provides. When it comes to tokens, it's almost never a bad thing to hold onto them for when you need them. This frees up your dials to take whatever action you want so you can benefit fully from having both the dial and token for when you need it most. Overall, Garm is pretty much the swiss army knife of the Rebel forces as he gives a little bonus to just about everything.
 |
| You get a crit.. and you get a crit! |
General Dodonna
General Dodonna is all about inflicting crits and picking the critical effect. For this reason, he's the biggest fan of having ships that can deliver crit effects onto the enemy fleet. Black dice ships like the MC30c absolutely love him, and with Assault Proton Torpedoes, you can pretty much guarantee what kind of effect you can place on the enemy ship. This can potentially be a game-changing Projectors Misaligned or even Structural Damage if you're looking to fish out that last bit of damage. For this reason, Dodonna enjoy any ship that can push through solid damage. The MC80 stands out above the rest because it can throw a good amount of dice, but the MC30c with its black dice, ability to take TRCs and APTs really makes it stand out above the rest. On other ships, XX-9 Turbolasers stand out like a sore thumb because you can really start piling on crits. At this point, you might as well run with Precision Strike as one of your objectives and bring a full flight of bomber squadrons to keep the crit train rolling full steam. Despite all the play centered around inflicting crits onto enemy ships, you are digging randomly and you might not always get what you need in that particular instance. This can make Dodonna one of those more fun if gimmicky admirals to play.
 |
| Unleash the Kraken! |
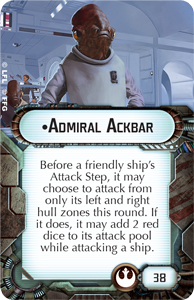
Admiral Ackbar
There's probably no other admiral in all of Wave 2 that shook up the meta more than this one. Admiral Ackbar is the commander that put Rebel firepower on the face of the map. For the first time in Armada history, Imperial players have to be wary about the ridiculous amount of firepower that can come spewing out of Rebel anti-ship lists. You will almost always see MC80s and MKIIs in a list with Ackbar as his flagship, but you will also see TRC90s and MC30cs as well because of their increased damage potential. In short, Ackbar is one of the most straight forward admirals in the entire game. There's not much you can say about two extra red dice on every attack out of the side arcs, it's more like one of those things you have to learn to accept. Just keep in mind that if someone chooses to use Ackbar's ability, they are locked in shooting from the port and starboard arcs. This is Ackbar's primary weakness and something that players should exploit in a hurry. Admiral Ackbar is currently the most expensive Rebel commander in the game and for good reason. He single-handily turns up the firepower of the entire fleet from decent to severe, and is now a permanent threat to every single list in the game.
 |
| The Walking Dead, but flying, in space. |
General Rieekan
While Ackbar is pretty straight forward with how he plays, Rieekan will just confuse you. A lot of people have been calling this guy the zombie commander and that's perfectly valid. Rieekan basically allows you to keep a ship or named squadron alive until the end of the Status Phase. This essentially means that no matter what you do to try and destroy that ship, it's going to be shooting at you no matter what. This basically nullifies the first player advantage most of the time as you simply cannot land a killing blow. In some cases, this can also be a huge detriment to the player who is going first, as you risk overrunning your position and exposing your rear arc to enemy fire. Without saying, you almost always want to take a few named squadrons with Rieekan and load up on ships that might otherwise die painfully. I'm talking about ships like the MC30c, the CR90 or virtually any other ship that you don't mind losing as long as you can get your shots in. While some players are looking at this commander with disdain, other players are exploiting the fact that Rieekan changes how players play the game. When Rieekan is on the table, things can get really tricky really quick as your normal order of operations go out the window and the strategy you were intiially going to excute falls apart instantly. I can't wait to see what kind of shenanigans this guy can pull off.
That's all folks. I hope you enjoyed this commander series.
0 (mga) komento:
Mag-post ng isang Komento